React-Router
- 2 minsReact-Router
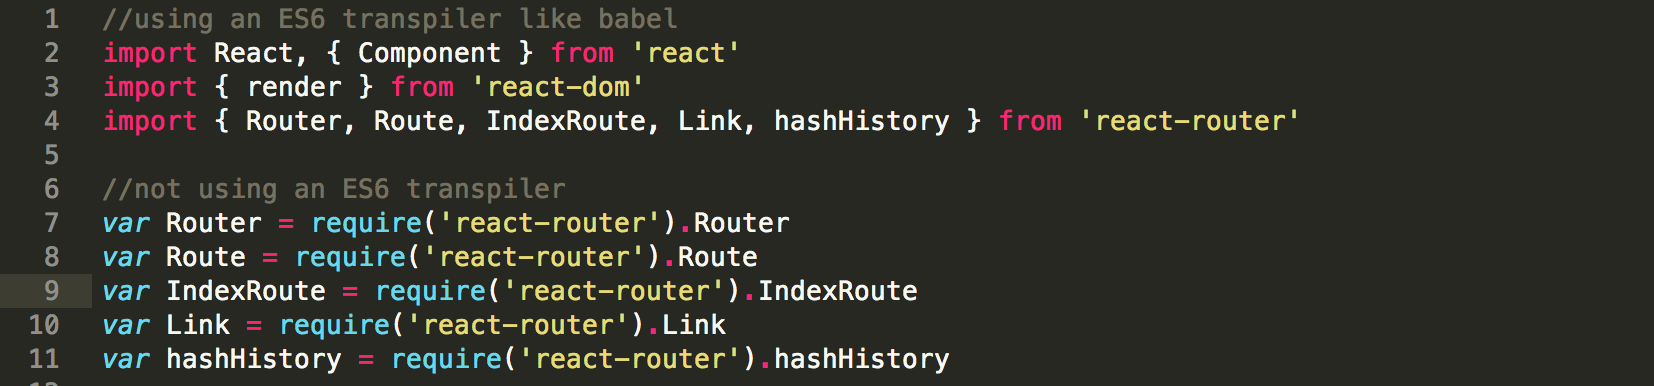
Another quick intro on how our group used react-router to navigate through our single page application. So with react-router, we are able to control which components are to be rendered for the users view. I’ll do a simple walk through of how to set this up. First you must install the dependency:

Then with a module bundler like webpack that supports either CommonJS or ES2015 modules, use as you would anything else:
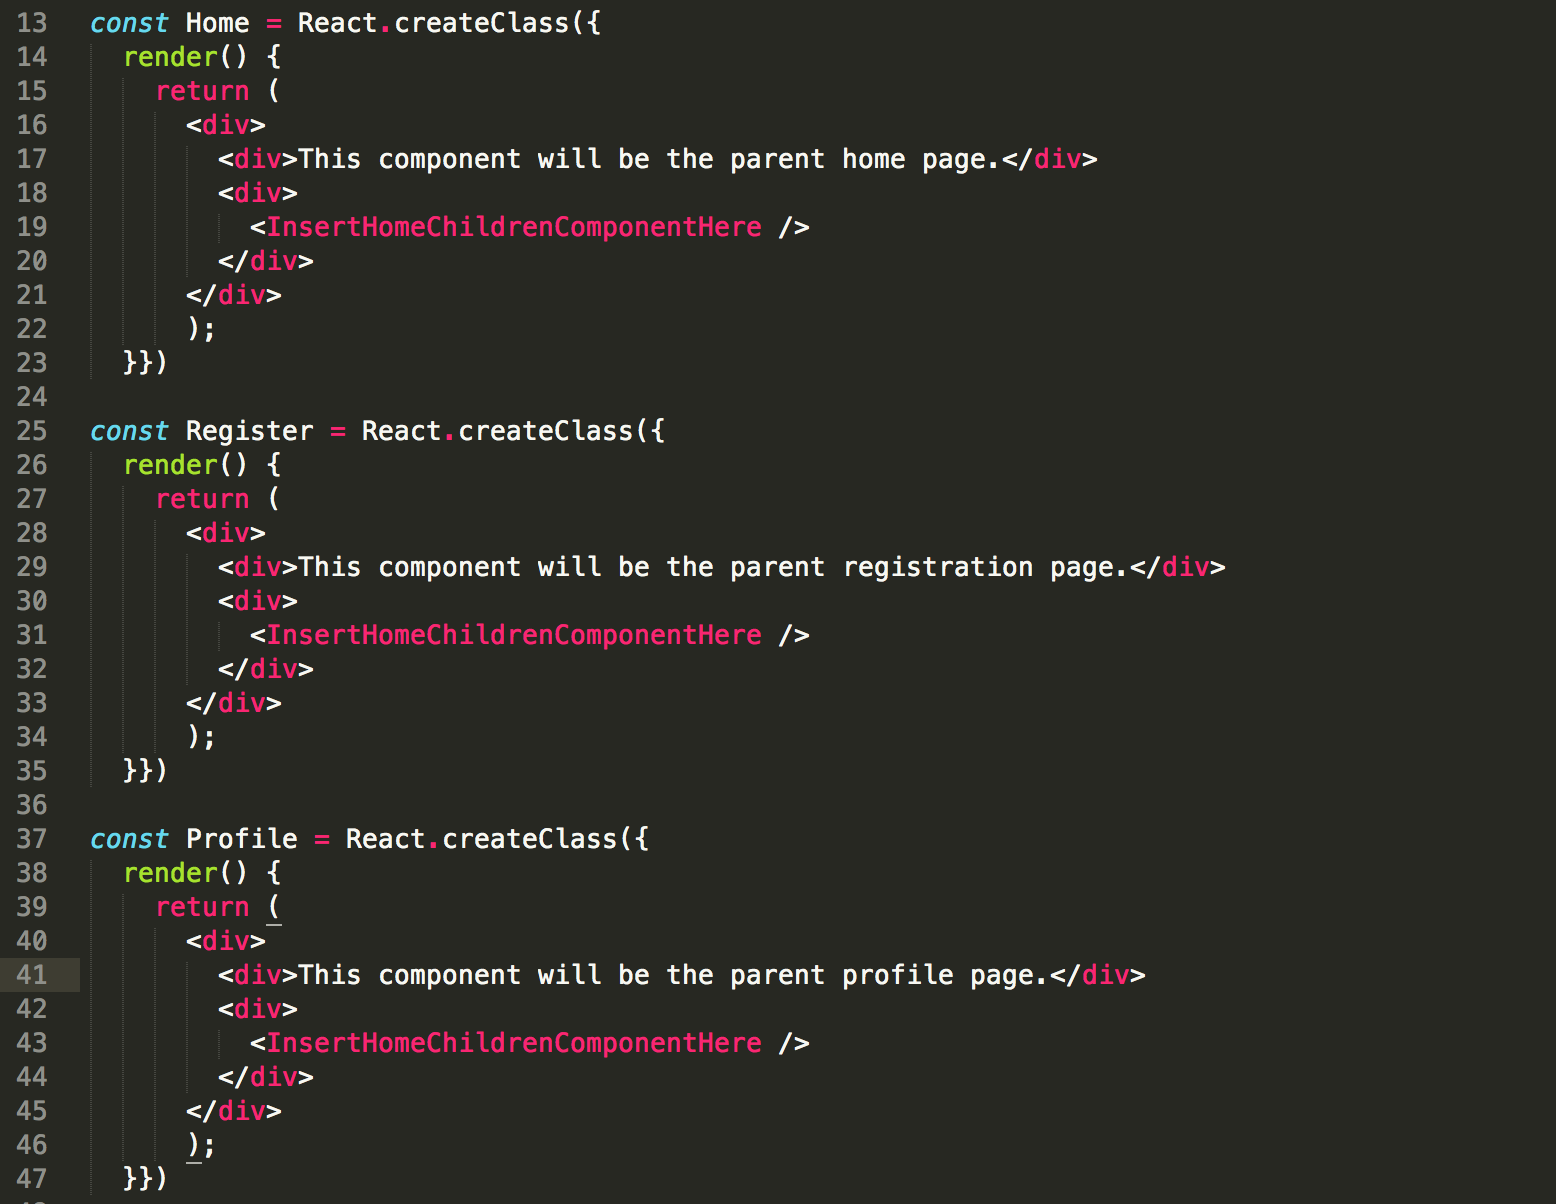
Once that is set up, then you can create your parent components as the main components to be viewed/rendered when navigating to those routes. For this example, I have created a home page, a registration, and a profile page component. Within each component, you can insert as many children component as you wish:
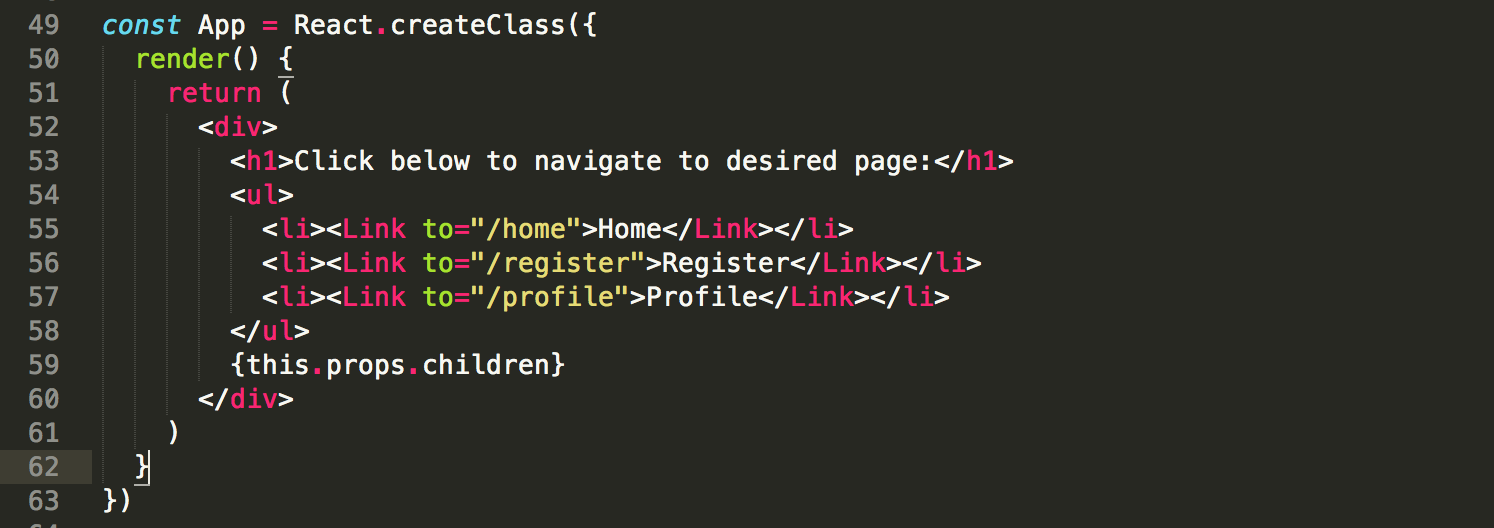
Once those components are setup, we can create the navigation component below. You’ll notice that we use Link instead of the the href that we all are used to seing. Also be sure to include {this.props.children} as indicated in line 59 below. The children components within the parent component will not render without this line of code.
And now finally we just need to render the routes:
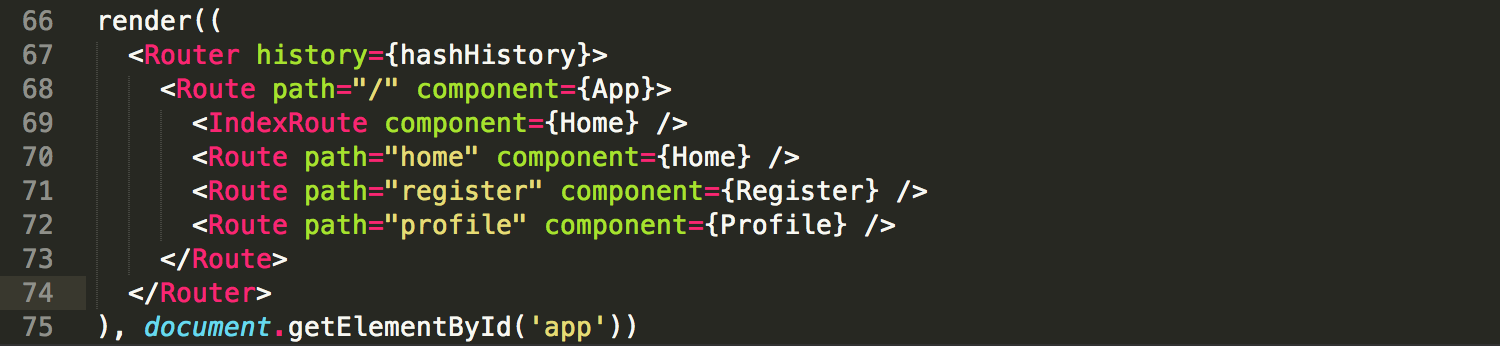
For the history, you can either go with browserHistory or hashHistory. We decided to go with hashHistory as it allowed for us to use the forward and back buttons along with the refresh button when navigating through our app (browserHistory does not allow for this). But feel free to experiment and see what better suits your app. The rest of the setup is pretty straighforward, assign the path name accordingly and then set your components to the name of the parent components created earlier. Voila - you’ve just set up your first react-router!

Aralya Phinith
A Man who travels the world looking for the perfect wave